Basic Pattern Information for
Patchwork Blanket

I'm not that brilliant at writing patterns but I try my best... :)
I have used Stylecraft Special DK wool (ordered from the lovely Wool Warehouse) and a 3mm hook throughout
Colours I have used are:
Cloud Blue, Lemon, Sherbert, Turquoise, Saffron, Fondant, Aspen, Sage, Parma Violet, Silver, Grape and a mixture of darker blues containing Denim, Storm and Aster
I used 240 Squares for my blanket which measures 54" x 34" I made 20 of each colour...now because they are small squares you can use a lot of left overs, for each square you only need approx. 2.5gram so you can make 20 squares with 25gram of wool. I used white to edge, join and border 3 x 100g balls was plenty.
I put the squares together totally randomly which I prefer
Each little square is just 3 rounds of granny shells (3 tr in one space)
I turn my work over after each round, this helps the square stay square and you don't get any twisting
tr = Treble Stitch
ch = Chain Stitch
ss = Slip Stitch
dc = Double Crochet Stitch
So here goes....
I always start off with a magic circle but use the chain 4 and join with ss to make a ring if that's what you prefer.
So with your ring I chain 4, 3tr into centre of ring 1ch, 3tr into centre 1ch, 3tr into centre 1ch, 2tr into centre ss around the post of first chain 4 to make the last treble...

This is after the third 3tr 1ch, the needle is indicating the 4chain post that is going to make up the third tr at the end (hope that makes sense)

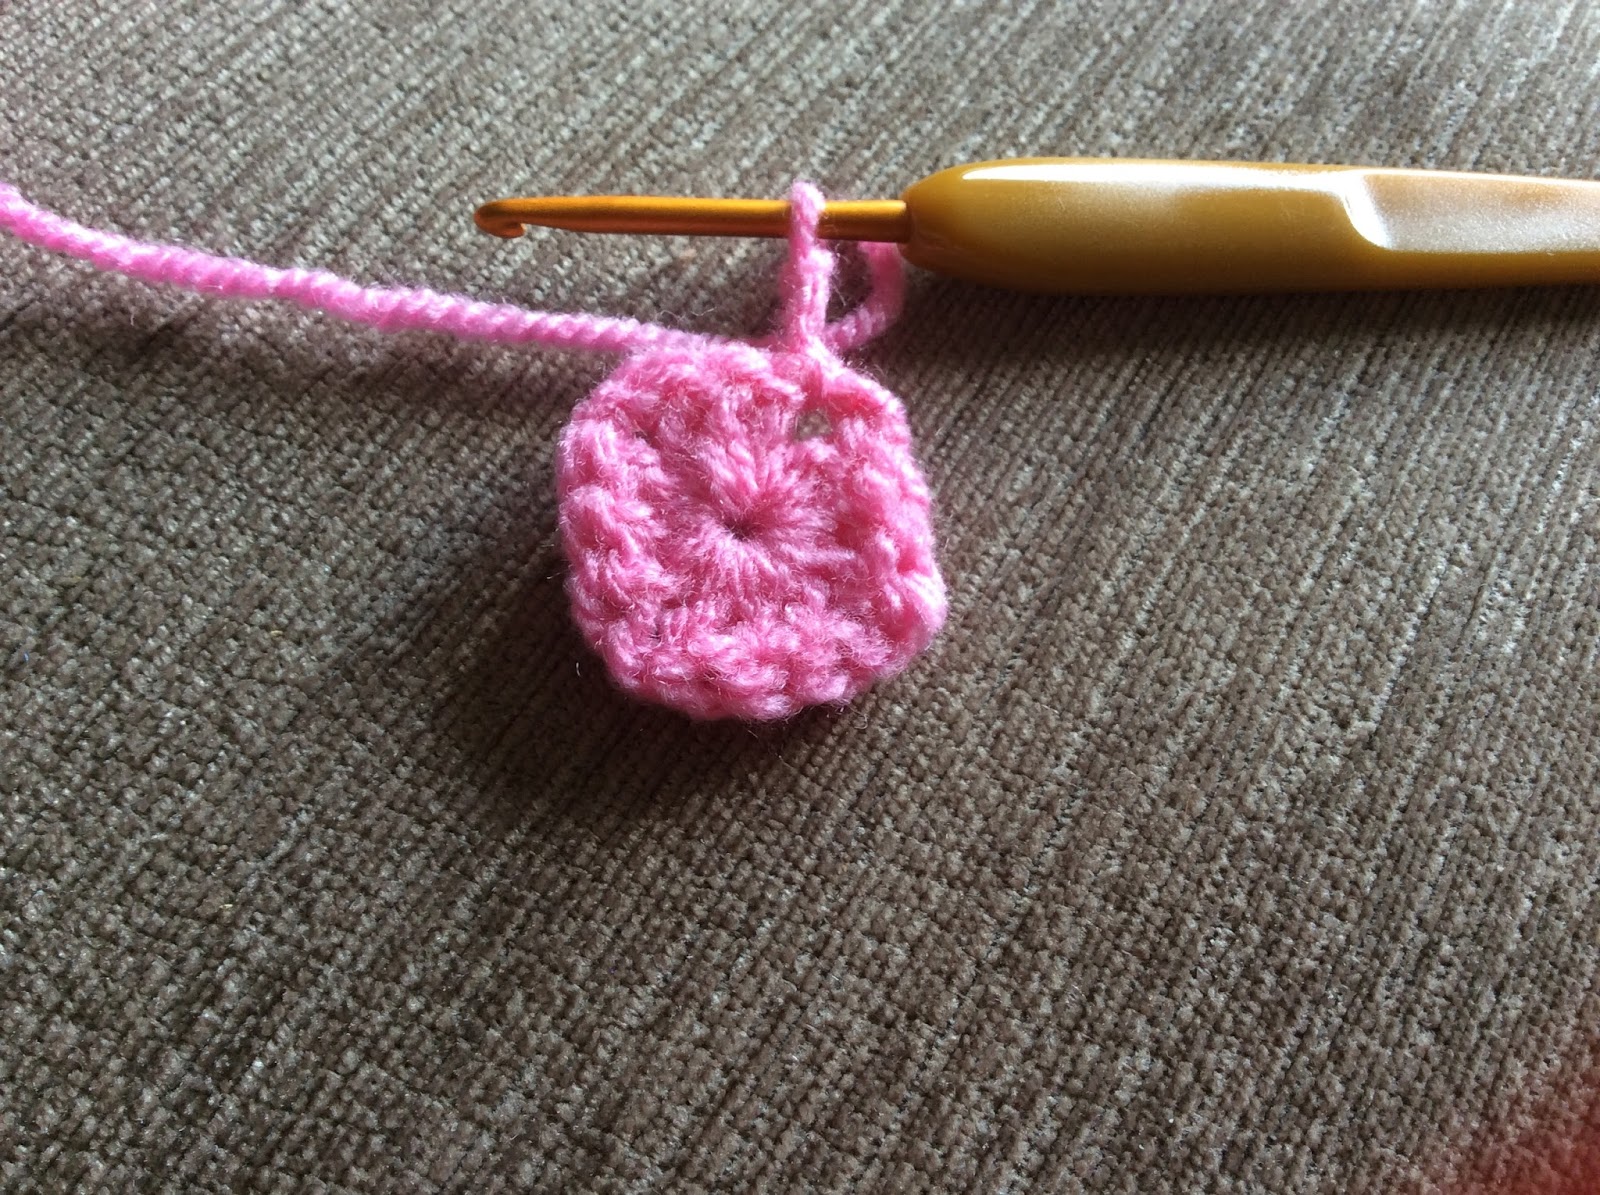
That's the first round done, you should have 4 groups of granny shells (3tr) and 1ch spaces that form the corners
Round 2
Chain 3, turn over and work on the wrong side now, (your 3 chain will become the last tr post on the last part of the corner)
In the next ch space, 3tr 2ch 3tr (makes first corner) in next ch space 3tr 2ch 3tr (2nd corner) in next ch space 3tr 2ch 3tr (3rd corner) next chain space 3tr 2ch 2tr ss round 3ch to complete final corner

slip stitch around first 3 chain post made indicated by the needle to complete last corner
Round 2 is complete
Round 3
Chain 3 and turn work over so your working on the right side again now...
In next 2ch corner space 3tr 2ch 3tr (first corner made), in next space between the tr stitches making the corners from previous round 3tr, in next 2ch corner space 3tr 2ch 3tr (2nd corner) in next space along 3tr, in next 2ch corner space 3tr 2ch 3tr (3rd corner), in next space 3tr, in final corner 2ch space 3tr 2ch 3tr, in next space along by your beginning 3 chain do 2tr and join with ss around post of 3ch to complete the last granny shell

Slip stitch around the first 3 chain post to complete the last granny shell, shown by the needle


And that's it your first mini granny square complete!
Break yarn and sew in ends
The edging round is made in white, its just a dc in each stitch with 2dc 1ch 2dc in each corner space

Break yarn and sew in end, or weave it through the top of stitches, which is what I do

Sew in or weave in yarn end
I know some people like to leave all the ends and do them last, but I'm not one of those people I get rid of the ends on each completed square straightaway, but its up to you.
As each square measures 3" you can decide on what size you would like to make, and its a great project for using up the little odds of yarn left from other projects

Just have fun making lovely little piles of squares :)

As I said early I laid out my squares in a totally random colour pattern, but you could do it stripes or diagonals if you prefer
I joined my squares using the crochet together method using dc stitches, putting row 1 first square and row 2 first square wrong sides together and crochet stitch to stitch all the way along then add square 2 and so on until you have worked all the way across you squares, then start on row 3 etc...
There are many videos on YouTube showing you how to do this if its your first time at having a go...
I join all the across seams and then all the downward seams, they need to be done in continuous seams across and downwards to give a good finish

Seams being sewn across the blanket
Once your squares are all joined together across and downwards, go all the way around your blanket using dc in each stitch and again using the 2dc 1ch 2dc in each corner to keep it flat.
You can complete your blanket with any edging or border you like, I chose to do the pompom edging I found on Pinterest. The pattern for this is beautifully explained photographed by Once Upon A Pink Moon, you can find the pattern on Pinterest by searching for crochet pompom edge or its pinned on my crochet board in Pinterest Click Here its by far a better job at the pattern than I could ever do :)
Well I hope that you have sort of been able to follow this and have fun making one of your own, I think I'm going to start another one :)
No comments:
Post a Comment